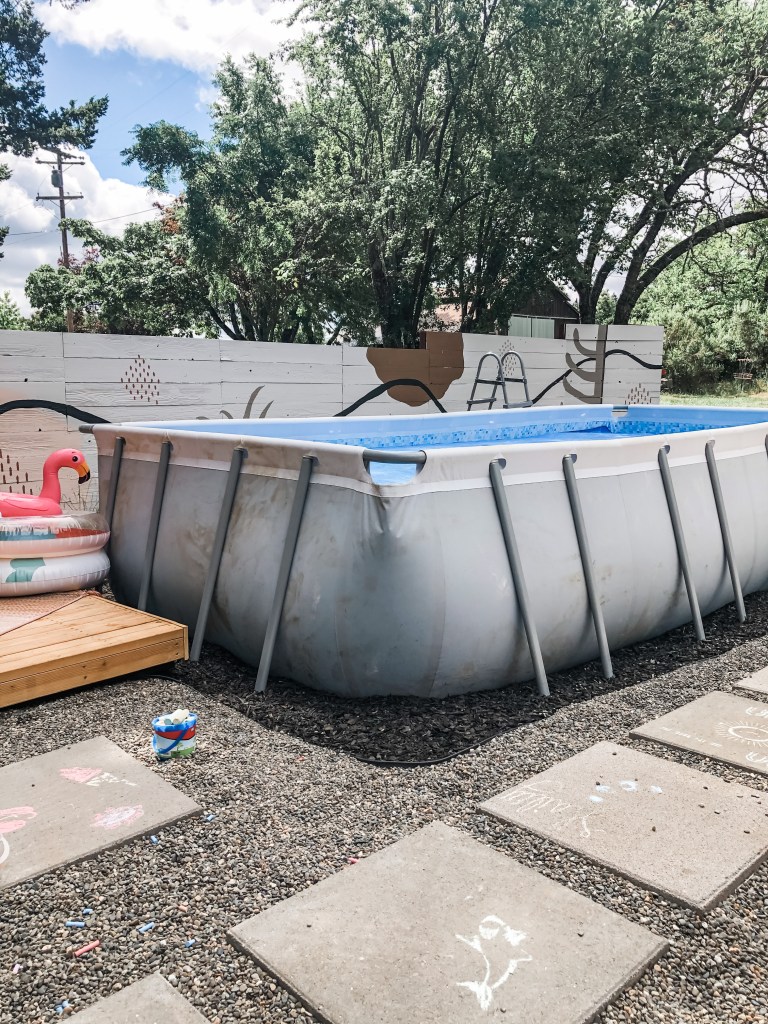
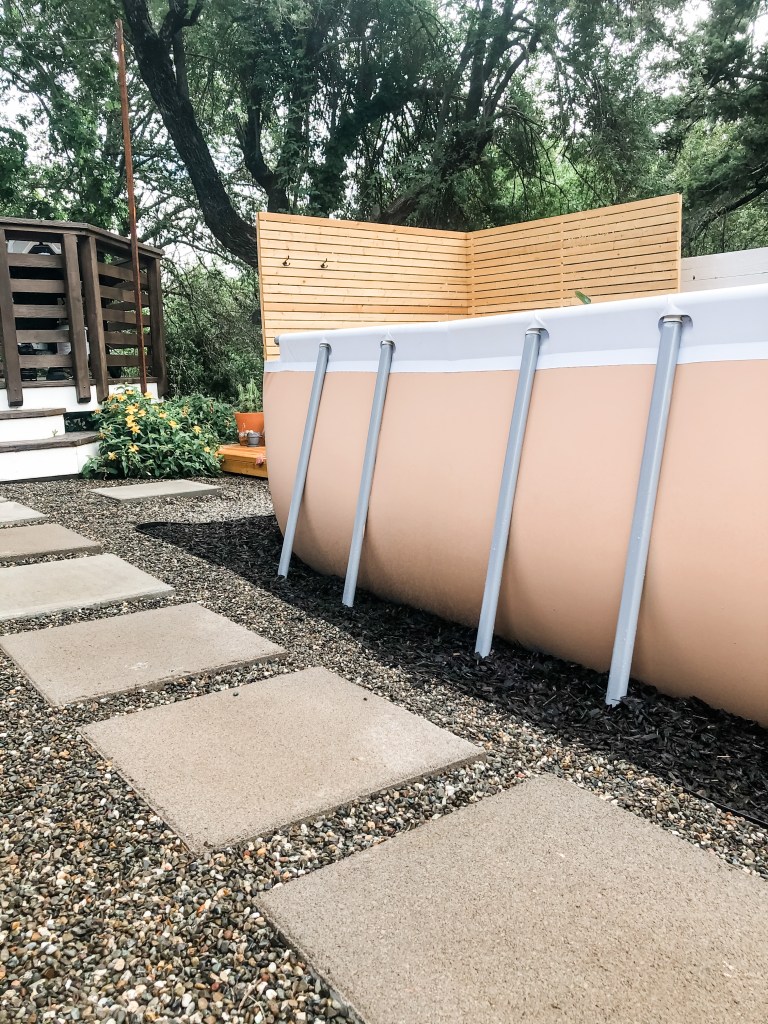
Don’t you love the look of an above ground pool? Yeah, me neither.
I scoured the internet for ideas on how to mask the beast but all I could find was deck surrounds.
As much as I love a good deck, I wasn’t about to drop hundreds of dollars and a lot of hard work on a non permanent structure like an above ground pool.
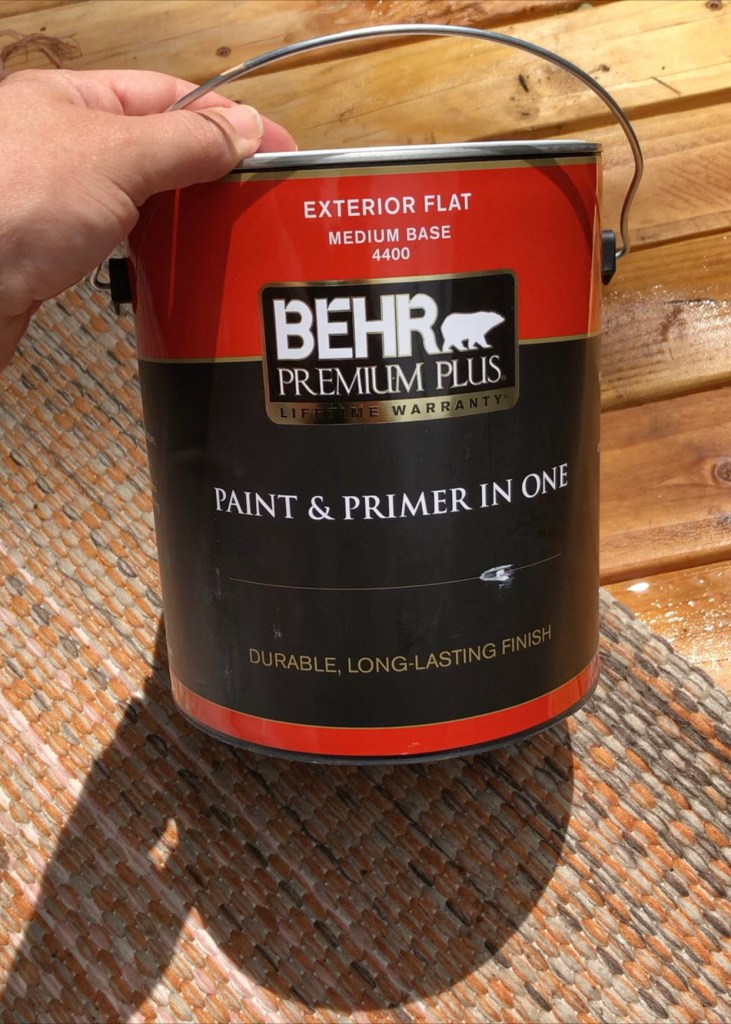
So I thought what is the most inexpensive way to make the biggest impact? (hint: paint is always the answer to this question)
Paint!!! Of course! Now lets research painting an above ground pool. Well…. looks like it hasn’t been done, cool. So that means I’m on my own.
I know pool walls are made of vinyl so I learned that for vinyl you want exterior, acrylic paint. Seems simple enough, why has no one done this?
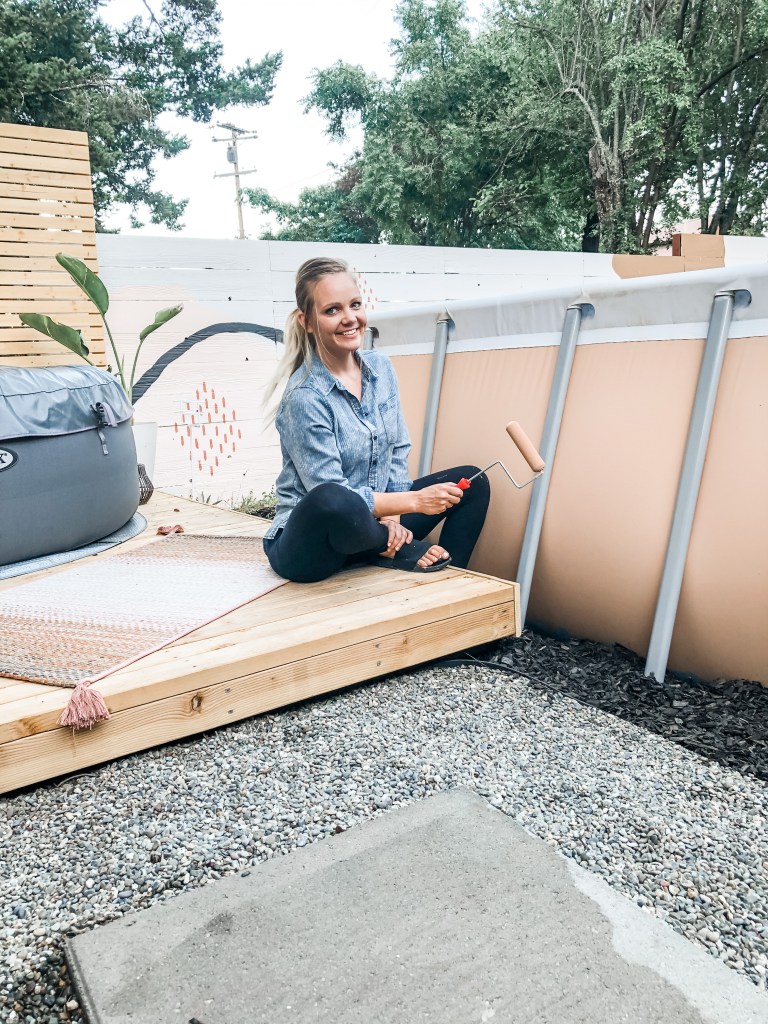
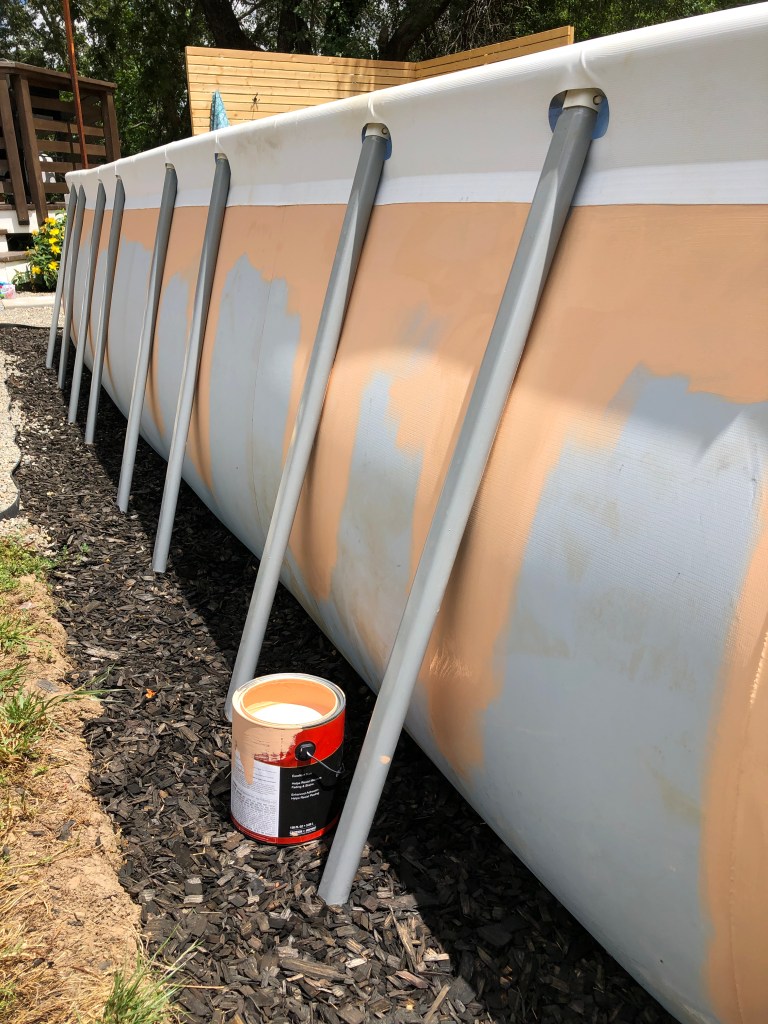
I made sure I cleaned the sides real good with a degreaser and set to painting. You guys, thats it! It was so easy and made a HUGE difference!!! Again I ask why has no one done this yet?!?
I started with cutting in around the poles and at the top, then used a foam roller for the rest.
Anyway, I’m done screaming about ugly above ground pools. Please try this and let me know your results!
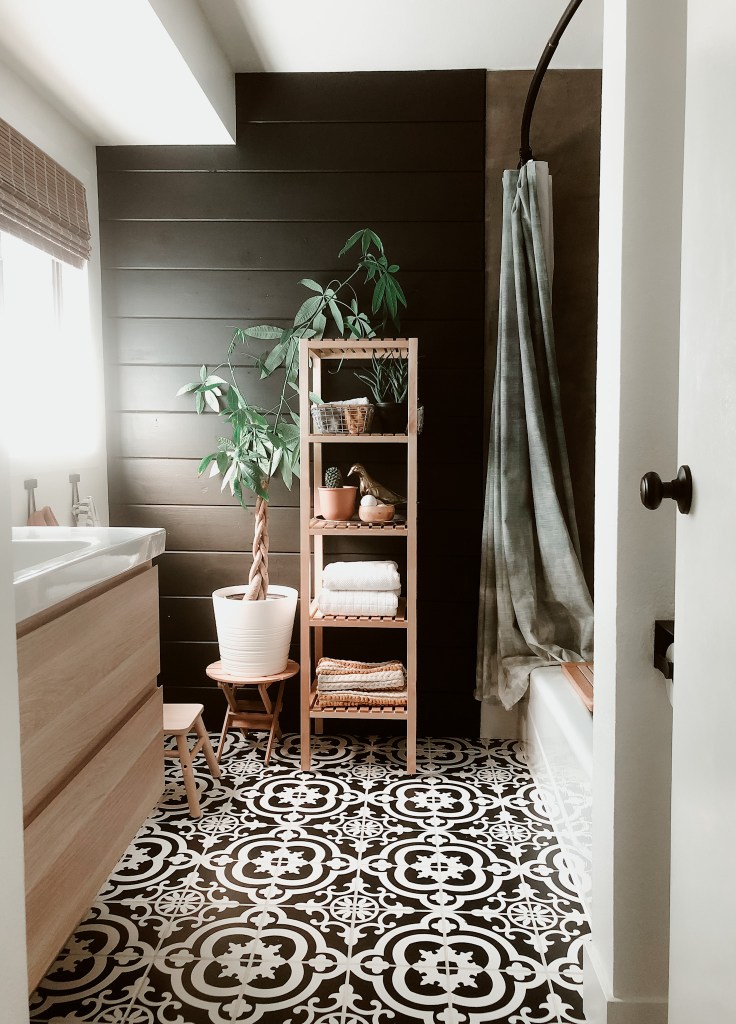
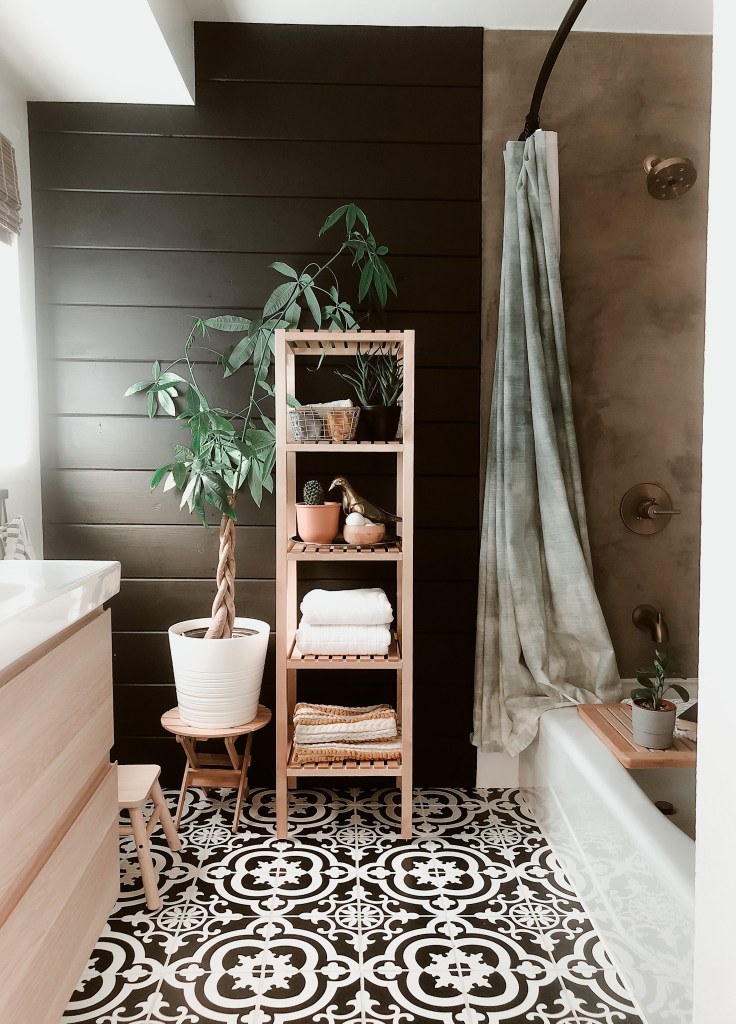
I’m finally sitting down to write about our bathroom renovation, it was the first full renovation we did on our own and it was quite the labor of love. It took months, but was so worth it! My biggest regret was not taking any before pictures, I’m so sorry. I can tell you the vanity and shower had brown tile from the 70’s that was falling off and the floor had tan peel and stick linoleum tile. Mostly it was just gross, moldy and basically unusable.
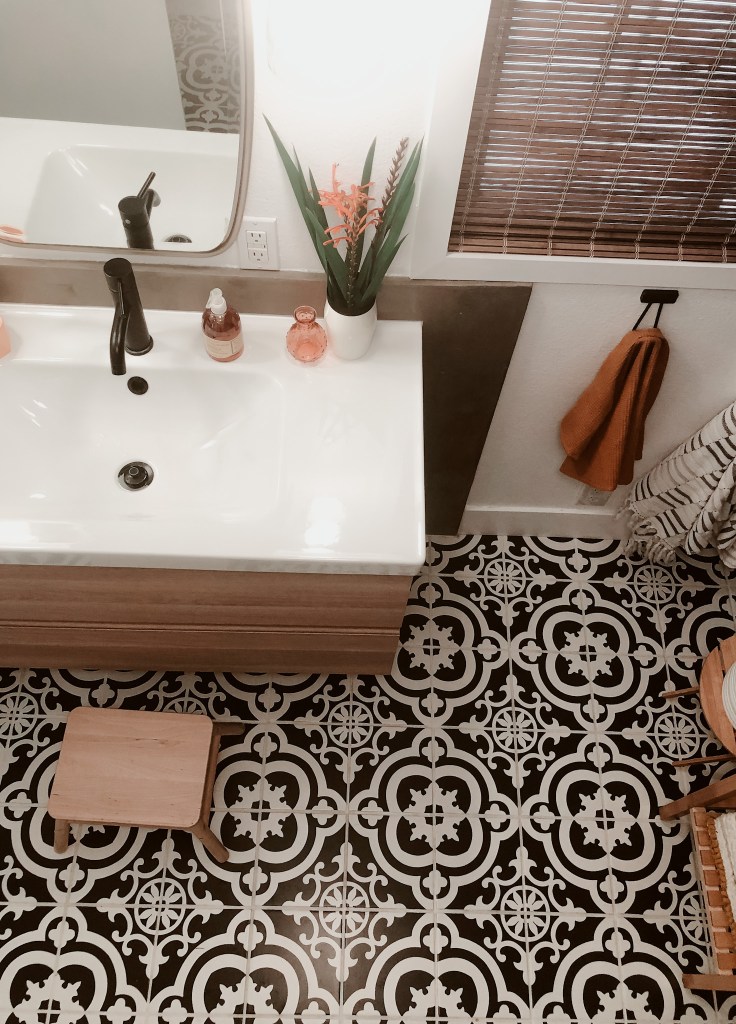
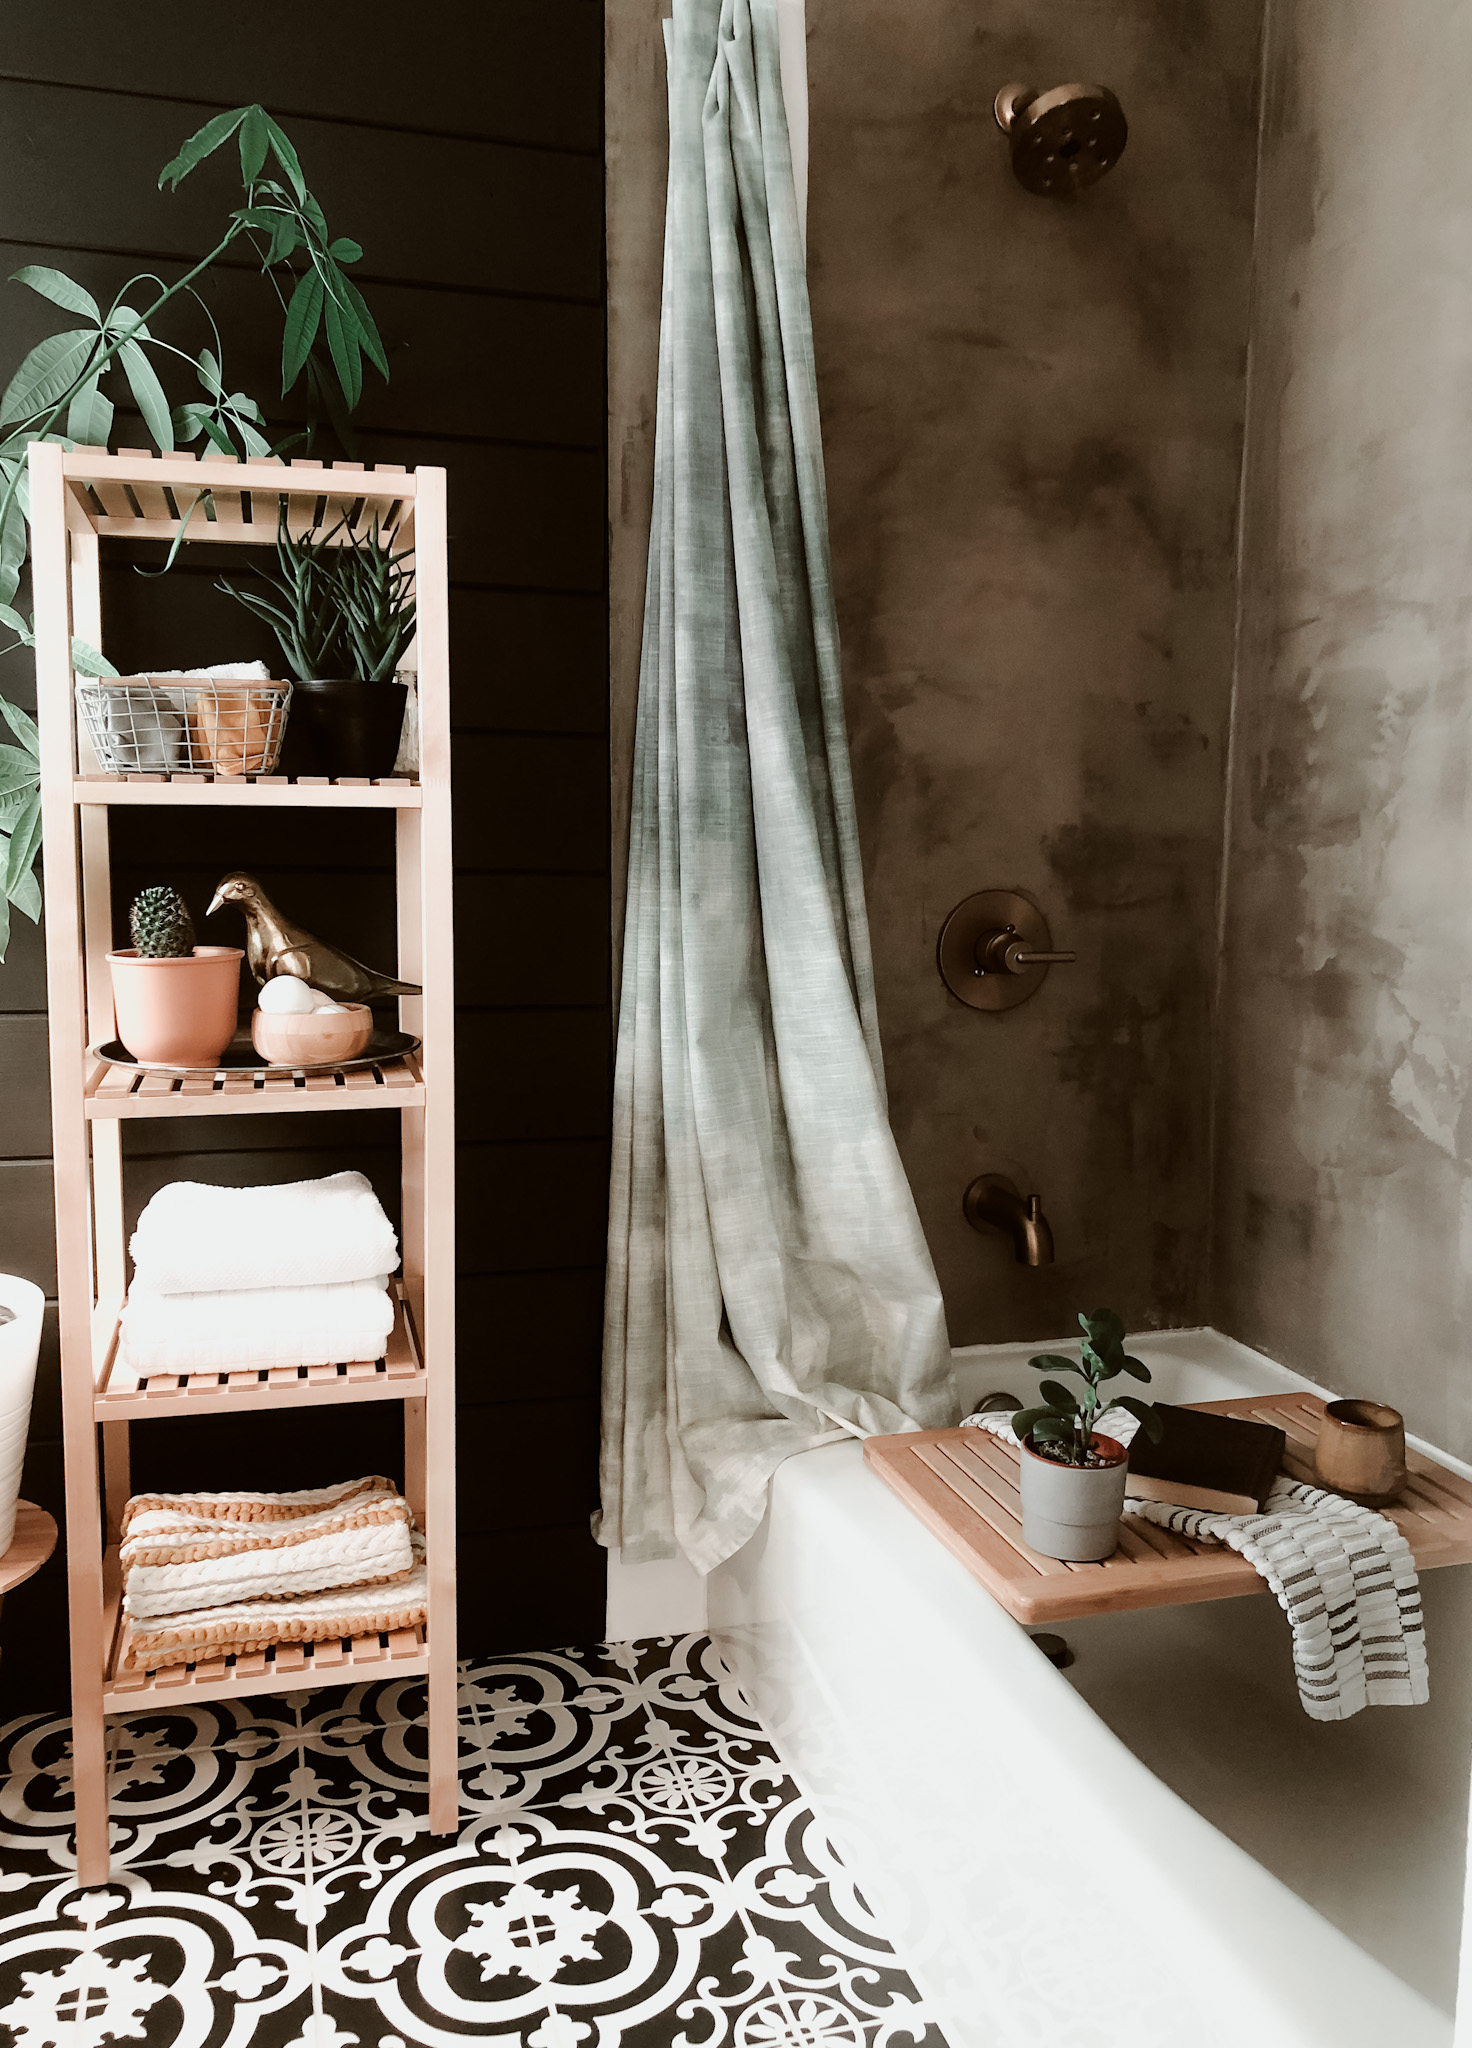
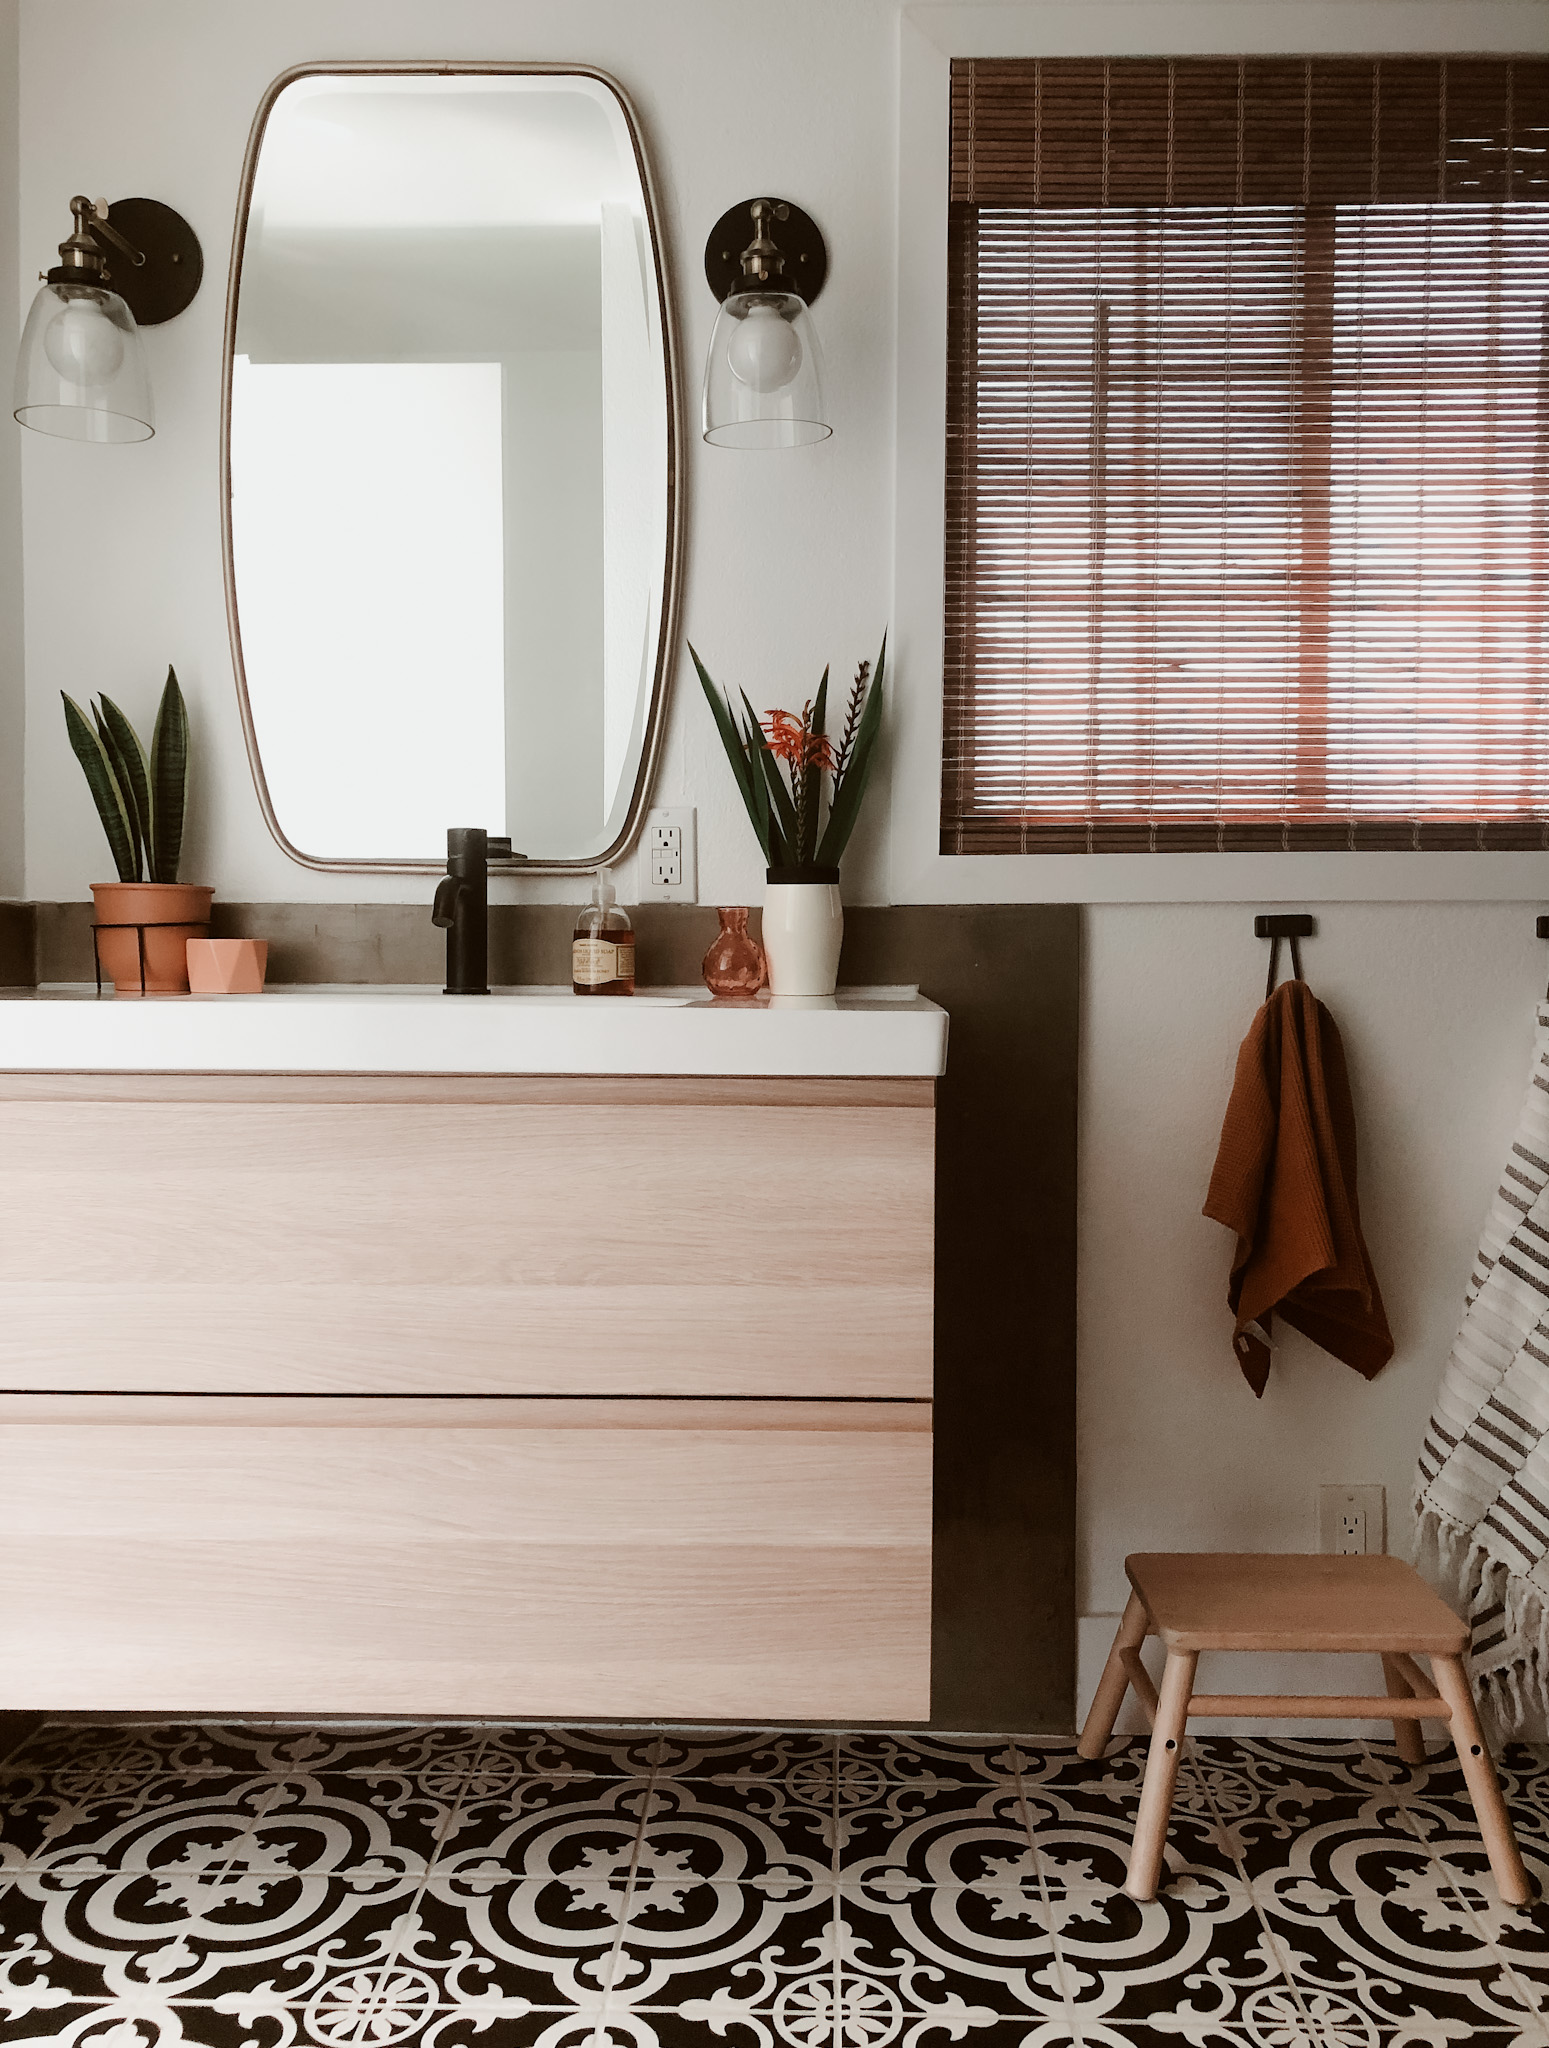
I started the design with the floor, I really wanted black and white tile. I’ve never installed tile before but I figured after a few Youtube tutorials I could figure it out, haha. After falling in love with many expensive options I knew I could achieve the look and feel with a cheaper version. These tiles I found at Lowes and they are always in stock so I didn’t have to wait for tile to be delivered and could return what I didn’t use. They really were a great option for our budget.
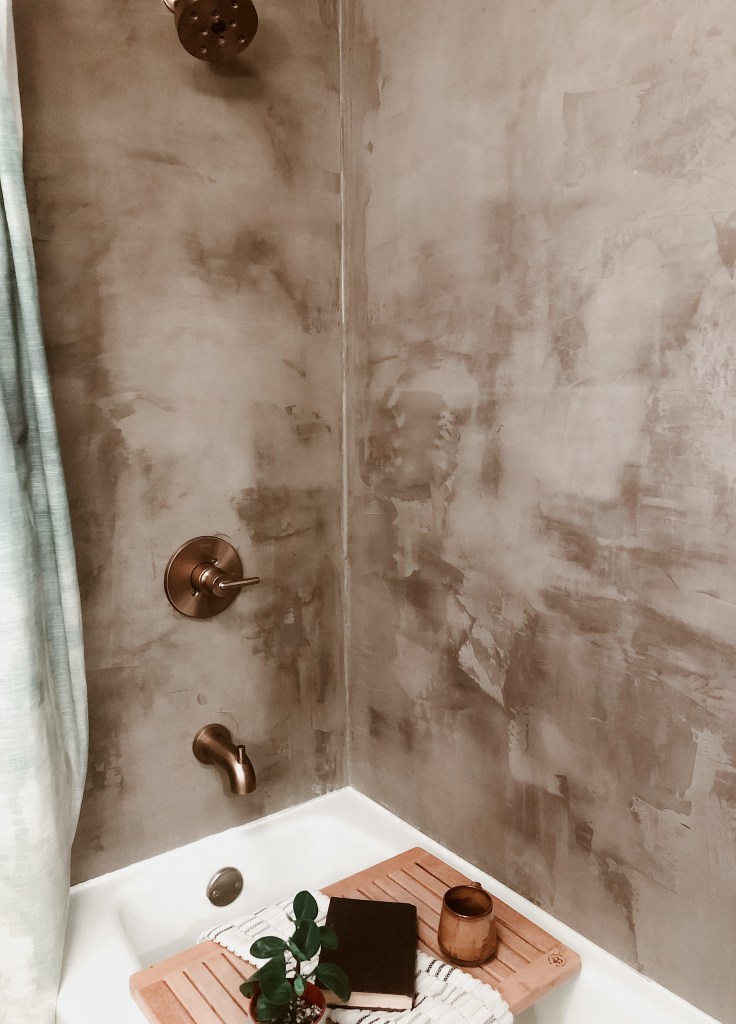
Another budget friendly decision was our shower surround. For some reason installing tile vertically rather than on the floor seemed much more difficult and out of my comfort zone. My husband came up with the idea of using a product called Ardex (basically a thin cement). It took about 3 and a half bags to cover the shower walls and each bag costs just under $40. We had to seal it with two different types of cement sealer, but even the cost of all of that was still cheaper and easier than tile, mortar, and grout.
I absolutely love how it turned out. Its durable, beautiful, very easy to keep clean. And I think the variation in color just adds to the charm.
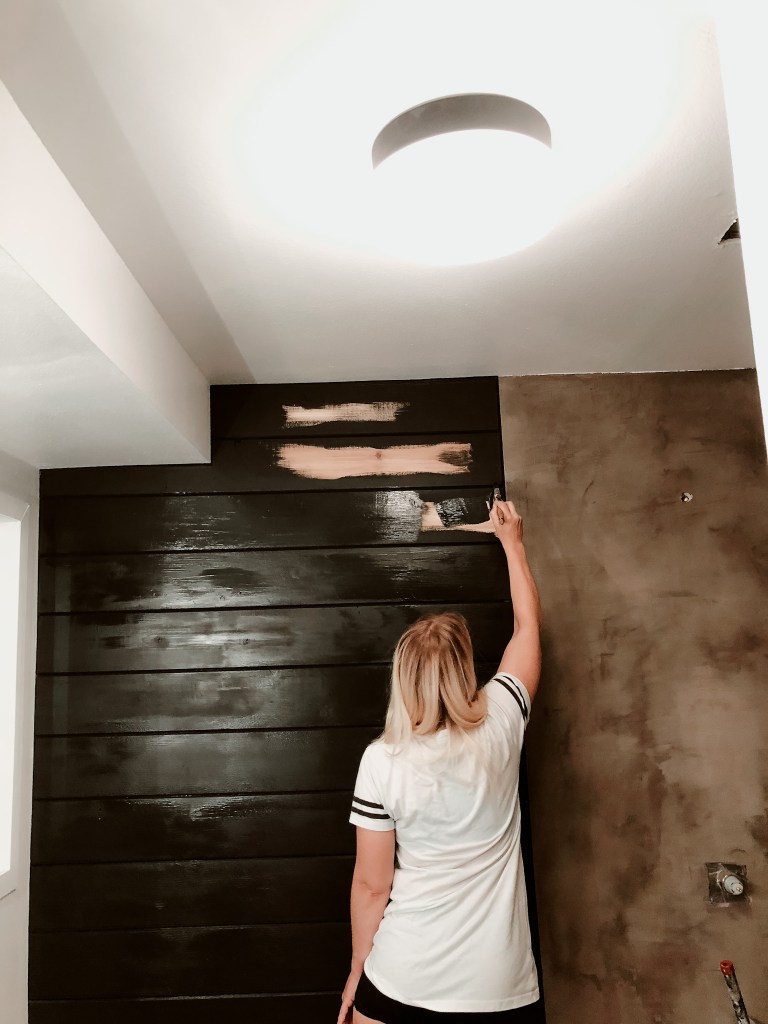
Lastly, I want to talk about this black wall. This wall was originally a doorway into a bedroom, but it was kind of awkward and really unnecessary.
We’ve learned from previous projects that mudding sheetrock and trying to match the wall texture is not something we are gifted in. We knew shiplap was trendy but also a little country and thats just not our vibe. We found this tongue and groove wood at Home Depot and decided to paint it a moody matte black to modernize the look a little bit. I think it tuned out great and plays off well with both the tile floor and cement shower.
There are so many more details I could talk about but for now I’ll just say that if you want to make a major change in your home but are afraid of the unknown or don’t think its in your budget, get creative! You are much more capable than you think and with the resources out there you can actually do a lot. When we demolished this bathroom we only left the tub and this whole bathroom cost less than $1000!
I know a whole renovation is not for everyone, but there are hopefully some aspects you might feel the confidence to take on yourself. I would love to hear your questions or design challenges, let me know below.
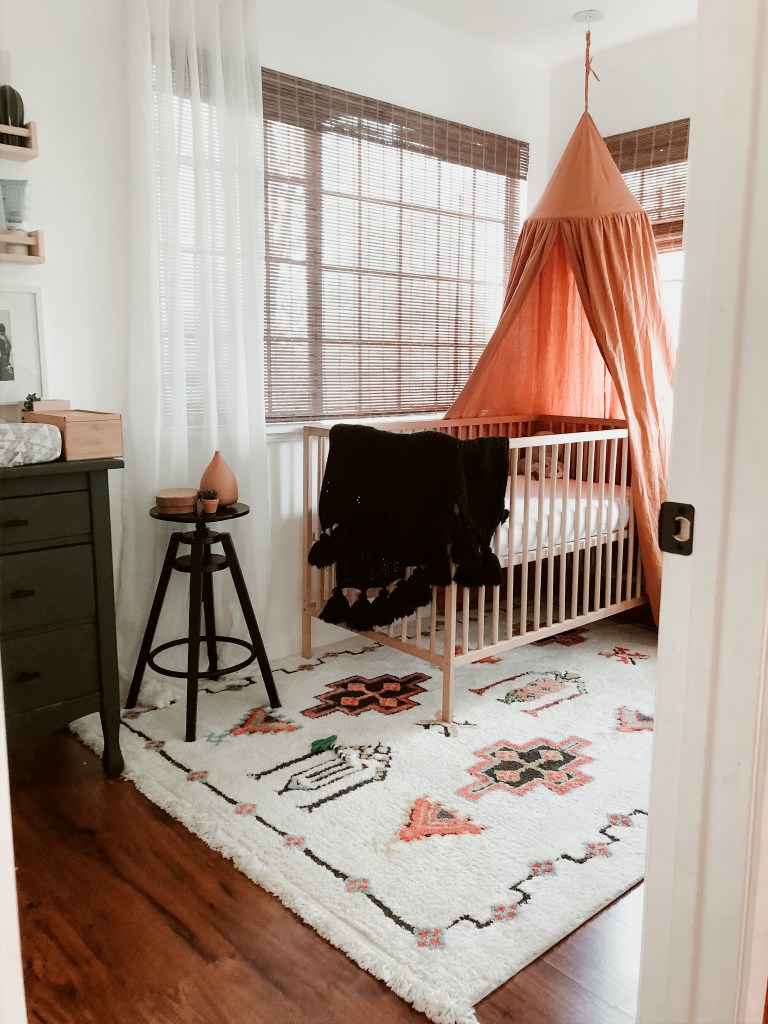
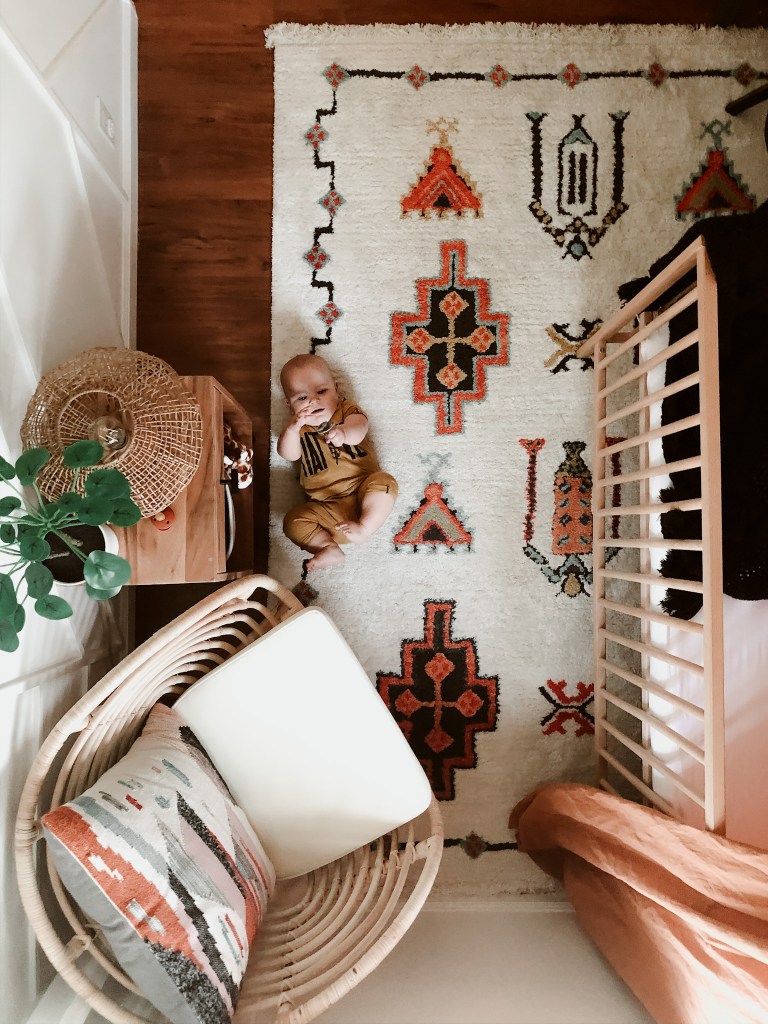
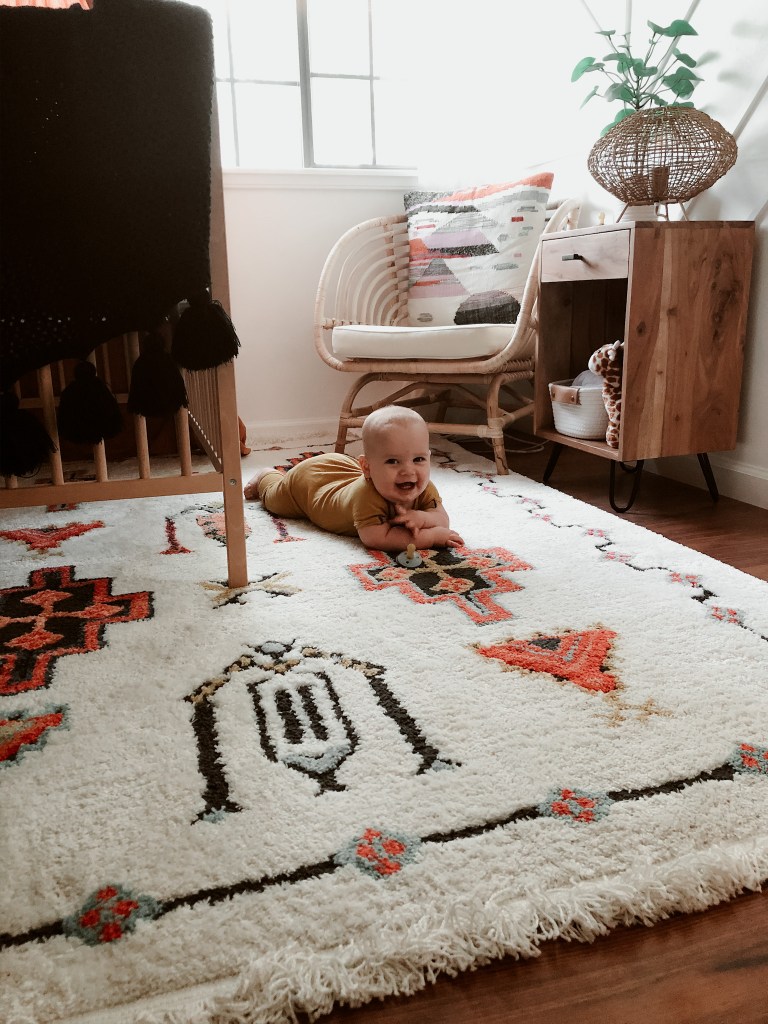
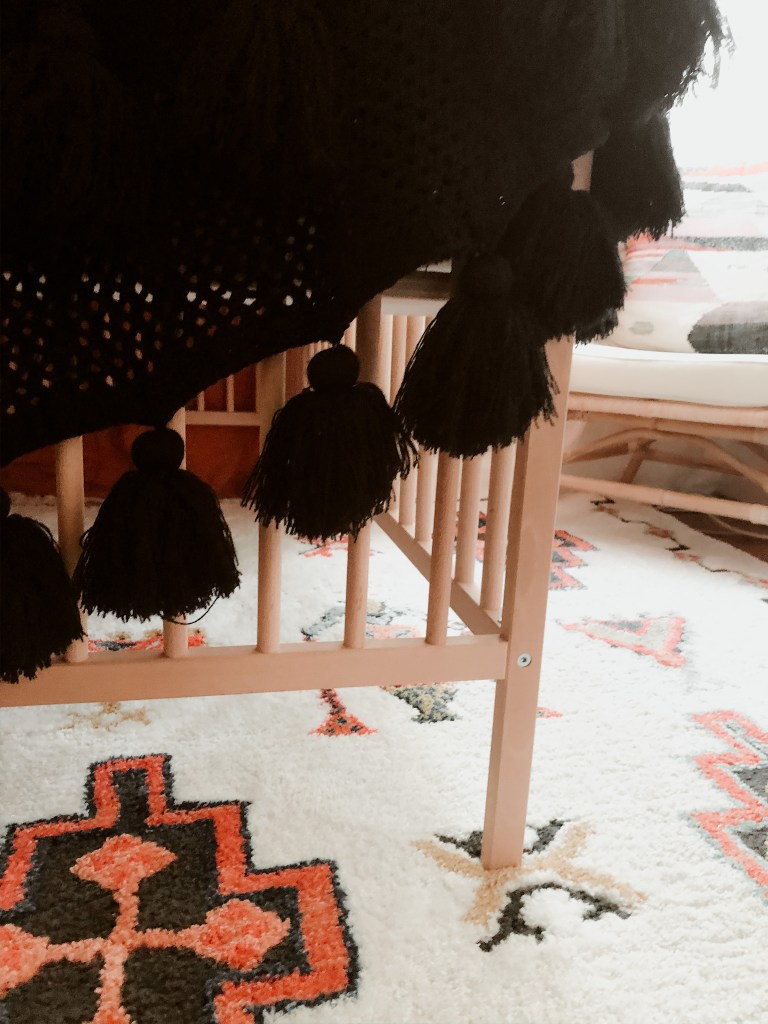
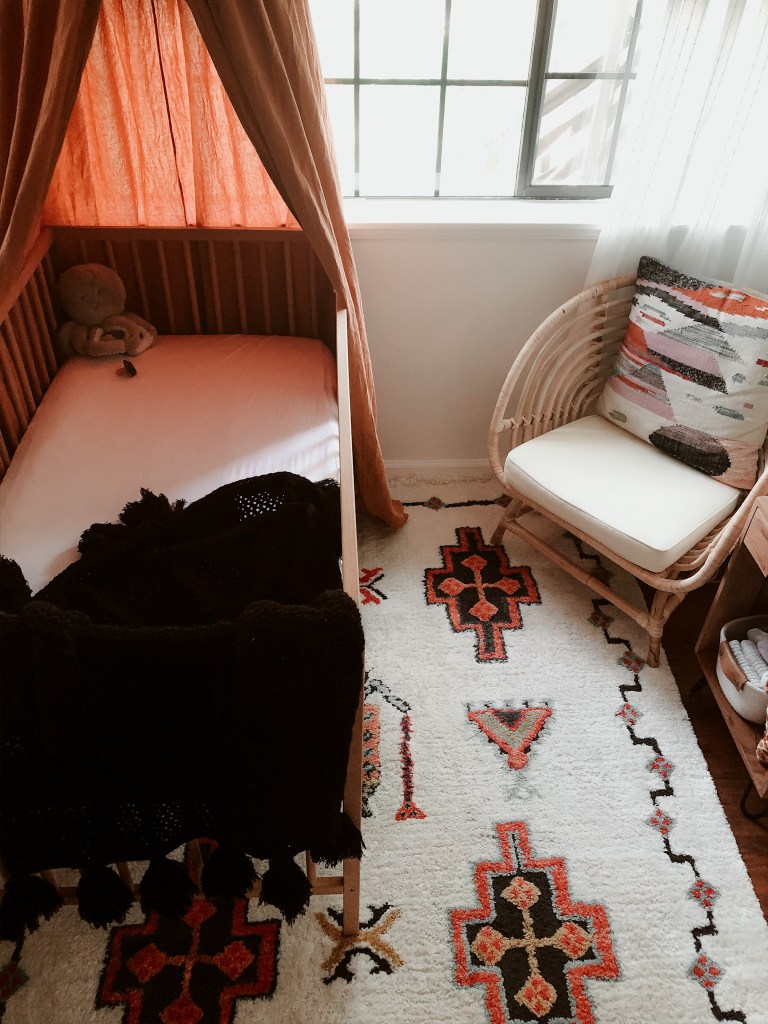
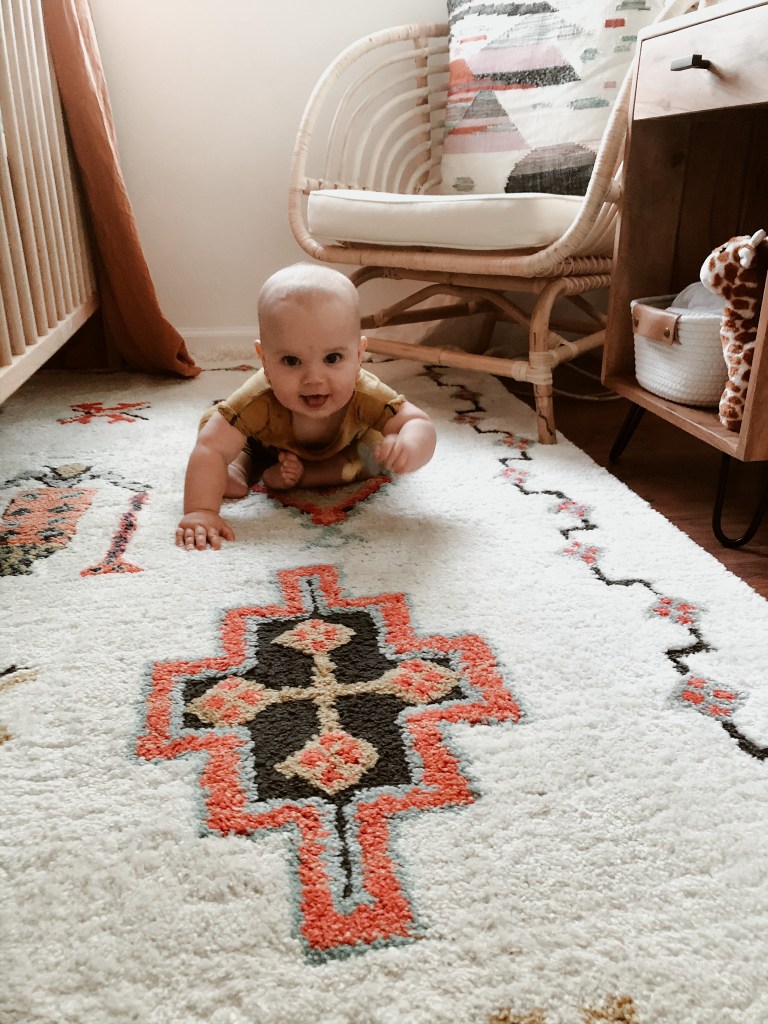
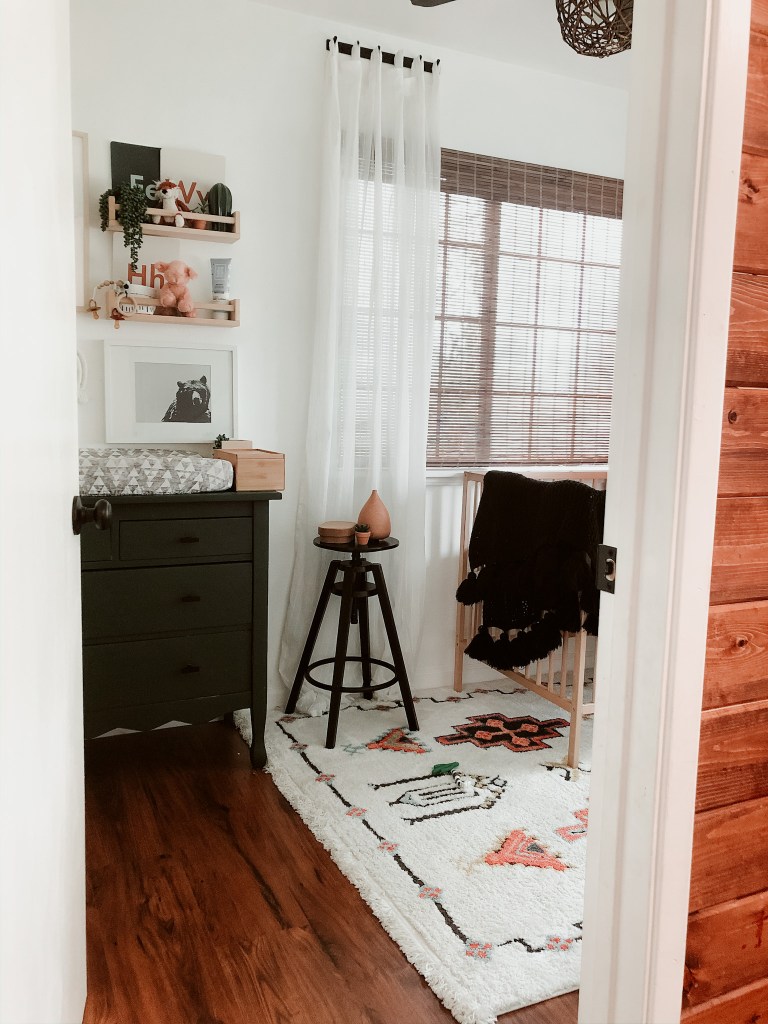
When I found out I was having my 3rd boy I was a little disappointed haha, but ONLY because I really wanted to design a room for a girl with all the girly things! I was also really into the boho/rattan/neutral rainbows trend and all of that to me screamed girl. I went on a Pinterest hunt to find a boho nursery suited for boys and was a little underwhelmed. So I came to terms that this design will have to come completely from my own head (no pressure).
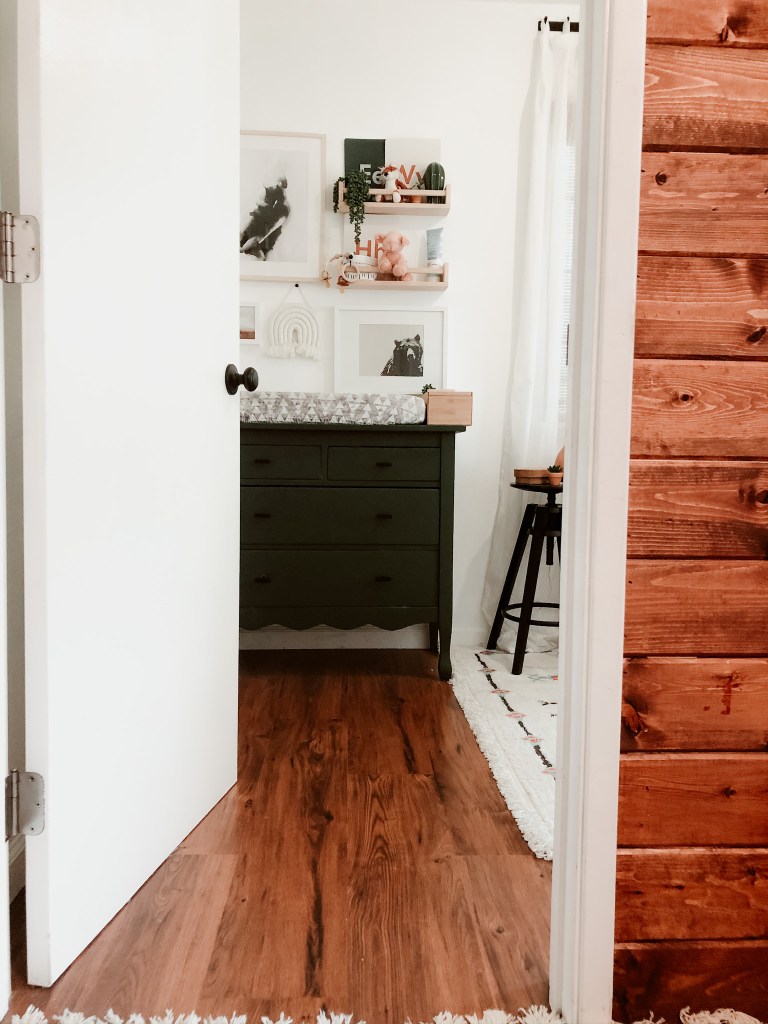
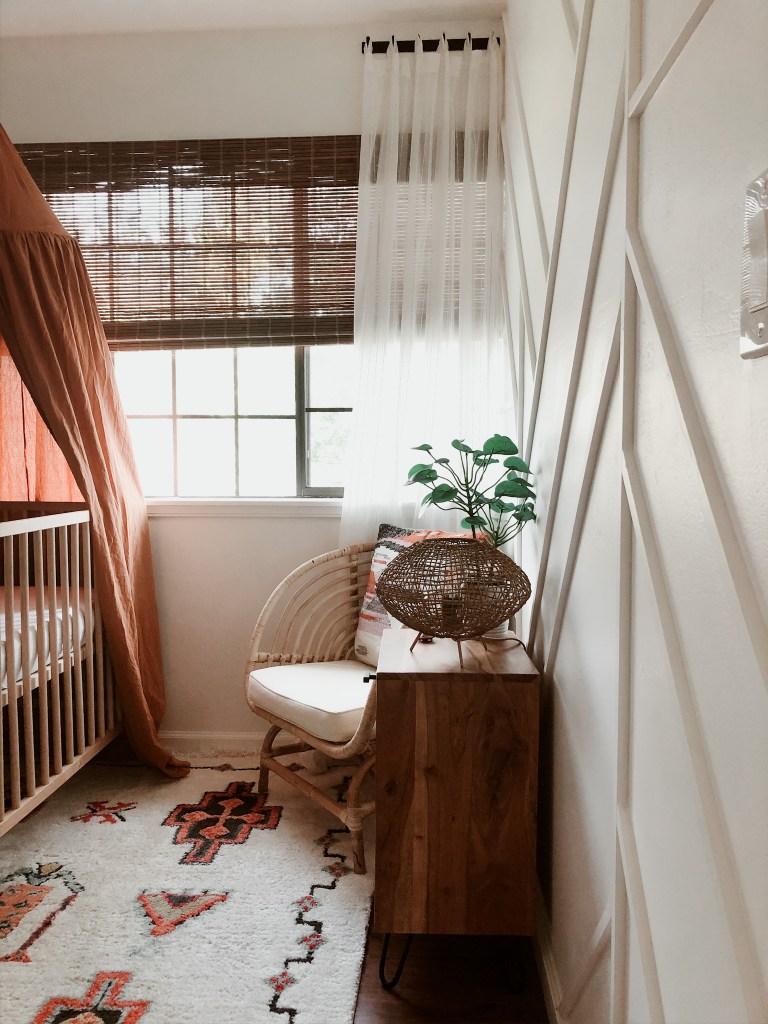
This room is small (6.5′ x 10.5′) and has no closet, so storage was key and most elements would need to play double duty to accommodate that. There are also two large windows that take up almost all of the wall space so even wall storage was limited. I knew my craigslist dresser would need to double as a changing table and finding an alternative to a closet was a must. I also found a petite side table that was perfect for storing late night feeding essentials as well as a beautiful, boho lamp.
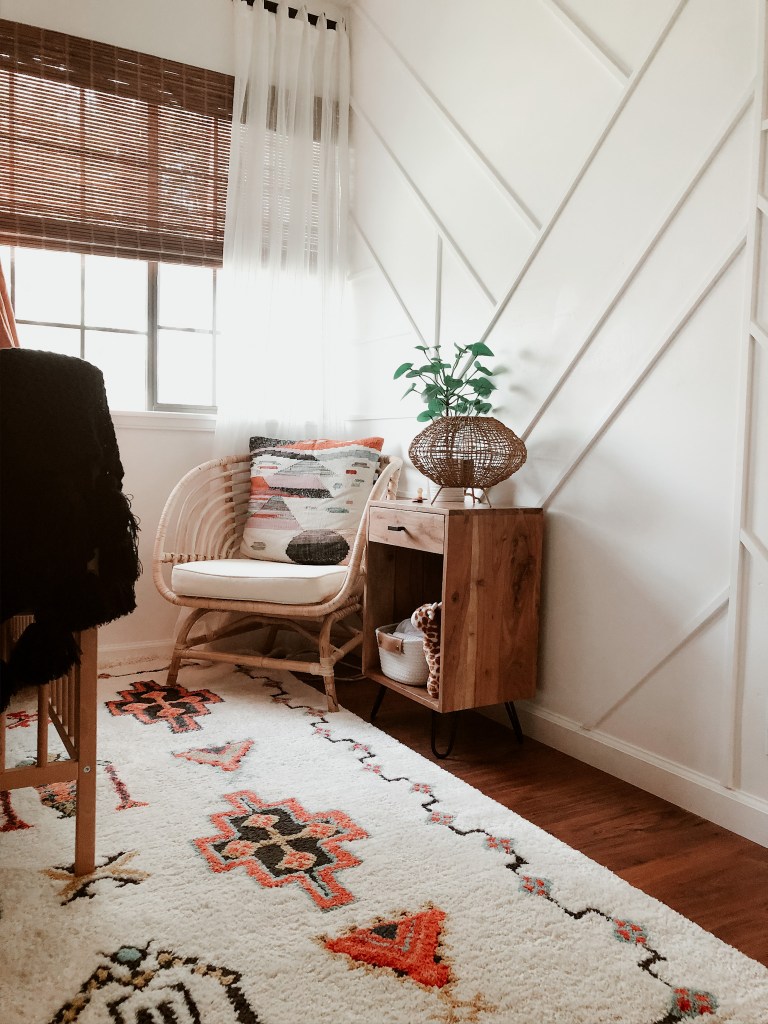
One of my favorite elements we incorporated was the feature wall. I had seen similar walls in other designs but they were always painted a moody color (beautiful but not right for this space). I knew to keep the small room feeling as big as possible I needed to keep all the walls the same color, even more so because the wall color would already be broken up by the large windows. So I went with white on white and really loved how it turned out.
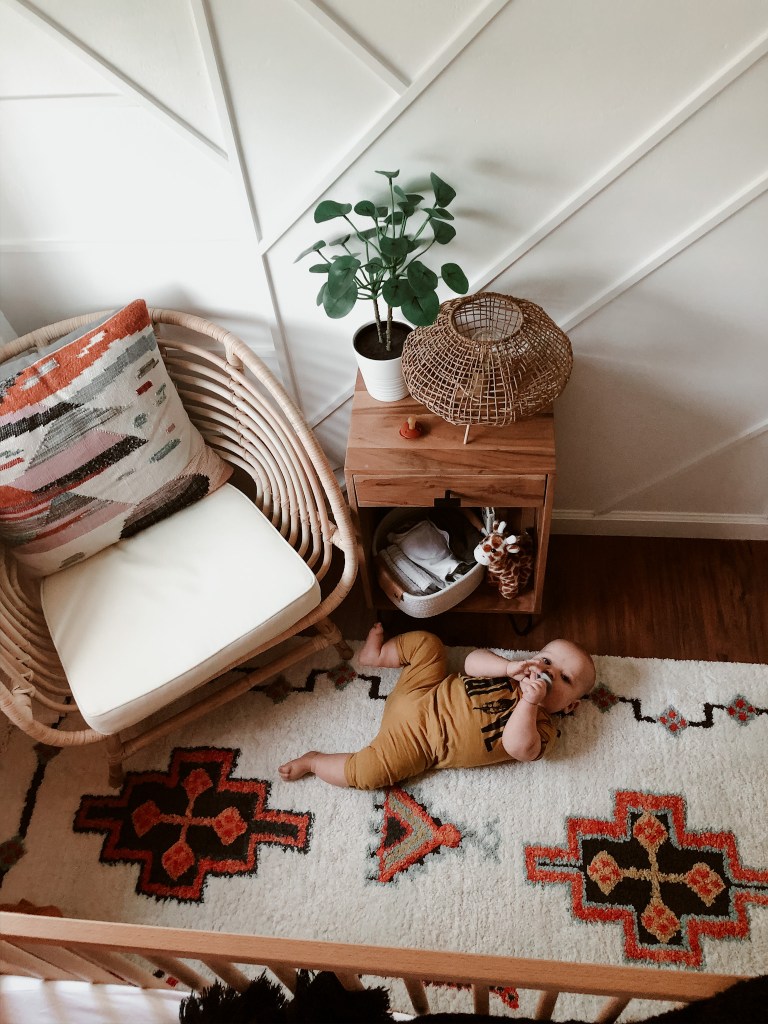
Layout was going to be tricky as I really wanted a chair included in the design. I knew a rocker would be out of the question, so something a little wider with a low profile is what I looked for. I found this beautiful rattan chair at Ikea.
As I started pulling in elements I wanted to be careful not to go too southwest looking or too feminine. As it started to come together I fell more and more in love and more and more excited for another incredibly special baby boy.
This is easily now my favorite room in the house and I often come in here to rest, decompress and just be still. Would love to know your thoughts or if you have any questions about resources!
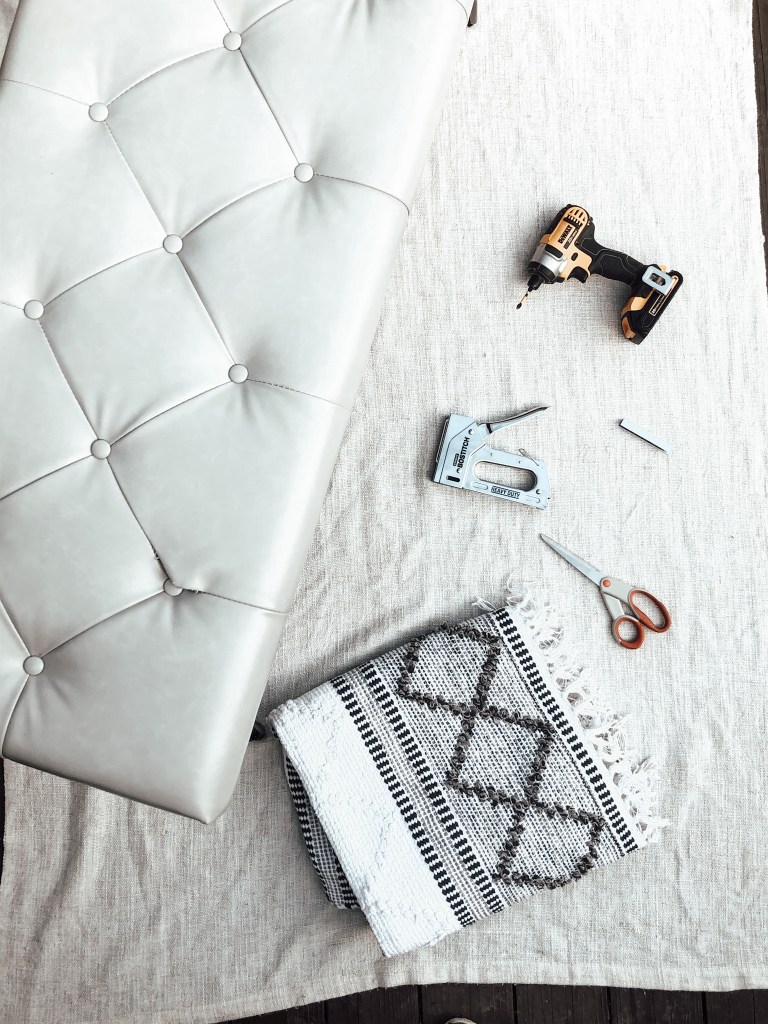
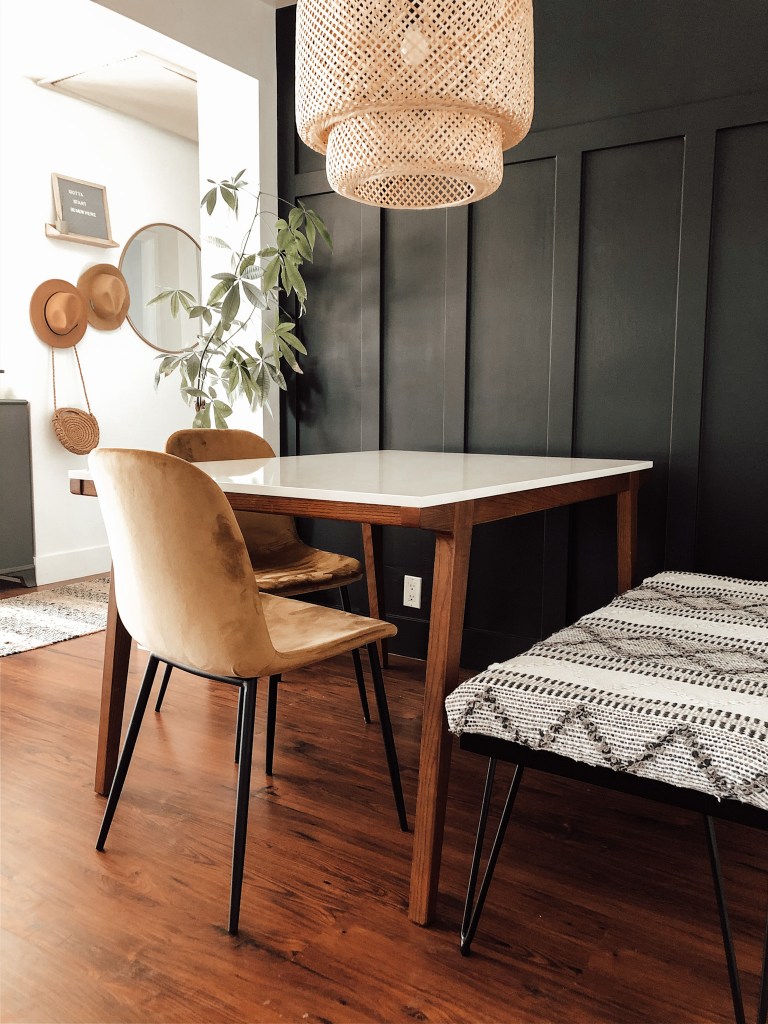
So I bought a bench on sale from a website that already sells cheap furniture, really just setting myself up for disappointment. When the bench arrived (surprise!) I was less then pleased with the quality of the fabric and after only two days the upholstery started to come apart! However, I still really liked the legs and the dimensions of the bench, so instead of trying to negotiate a return I decided to make the best of it and see if I could recover the bench with something a little more special and a little more me.
While perusing TJ Maxx Homegoods for nothing in particular I spotted a beautiful boho rug and new immediately how I wanted to use it. It was thick, durable, had a beautiful texture and a great neutral color. The price was only $29 so even if I brought it home and felt it wouldn’t work for the bench I could surely find another place for it in my home.
Recovering seating is so much easier than most people think.
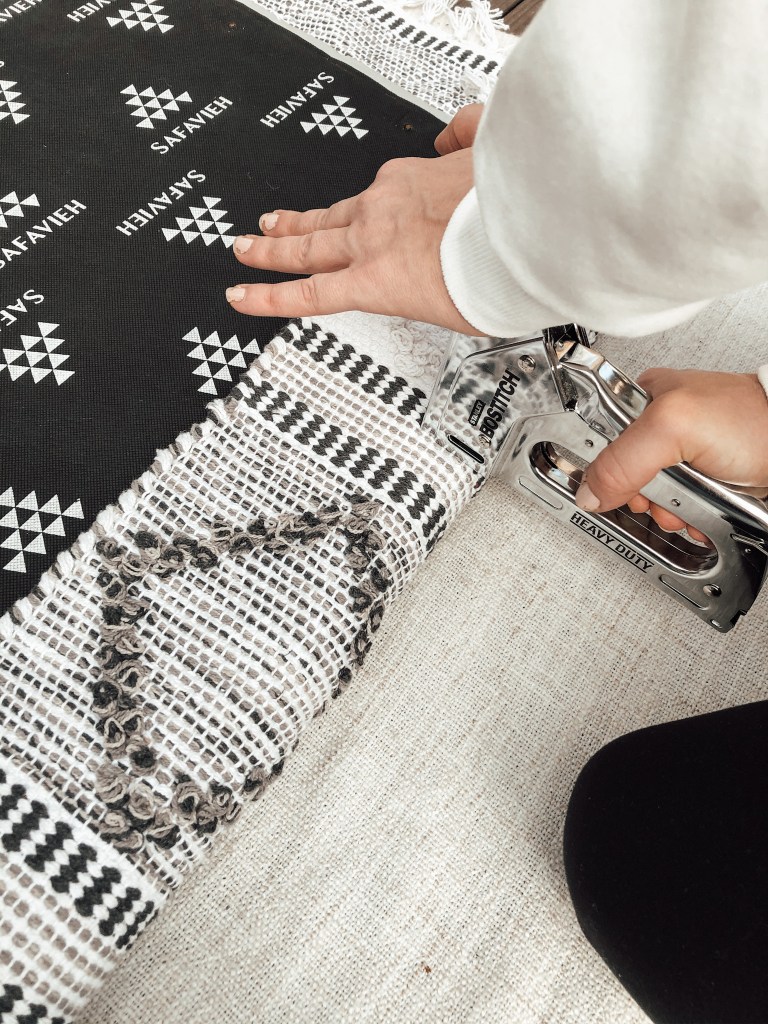
You only need a staple gun, staples, scissors and a screw gun to complete the project.
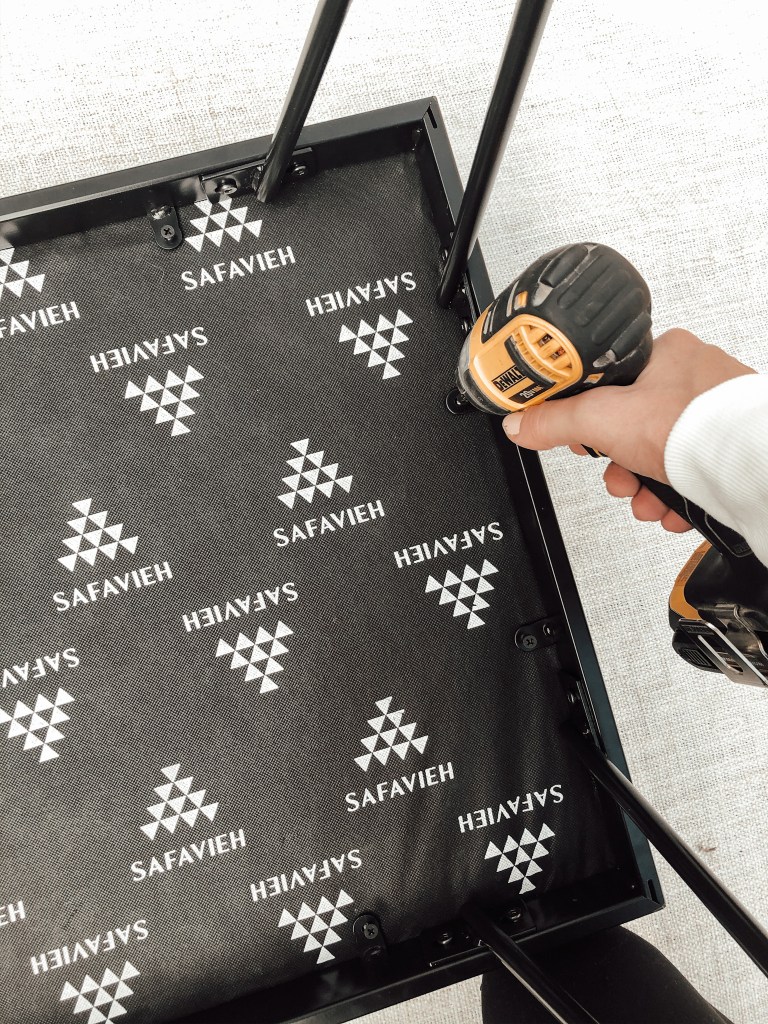
To start, turn the bench upside down and unscrew the legs from the cushion.
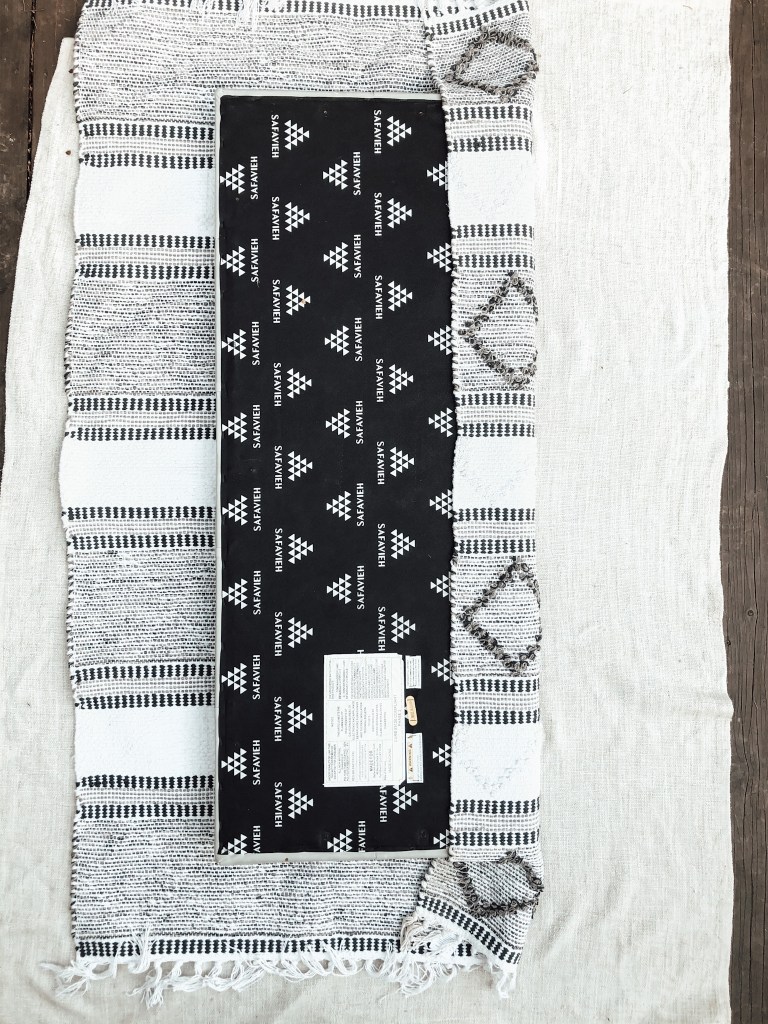
I didn’t even bother taking off the old fabric, I simply wrapped the rug around the existing cushion, tufted buttons and all. Like I said the rug was thick so I knew it wouldn’t be an issue going straight over the old cushion fabric.
Once I lined up how I wanted the rug to lay on the cushion I began stapling it to the back. Being careful not to cover up the existing screw holes, I started with the long sides of the bunch pulling tight as I went along. Placing staples only a few inches apart helped to secure such a heavy piece of fabric.
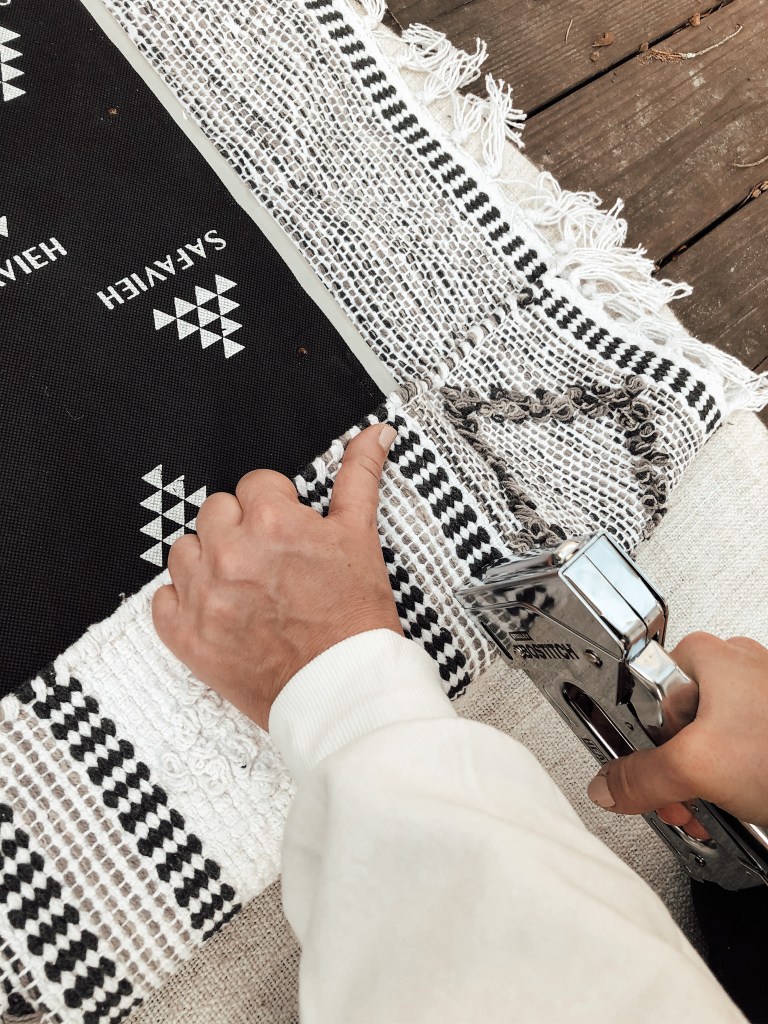
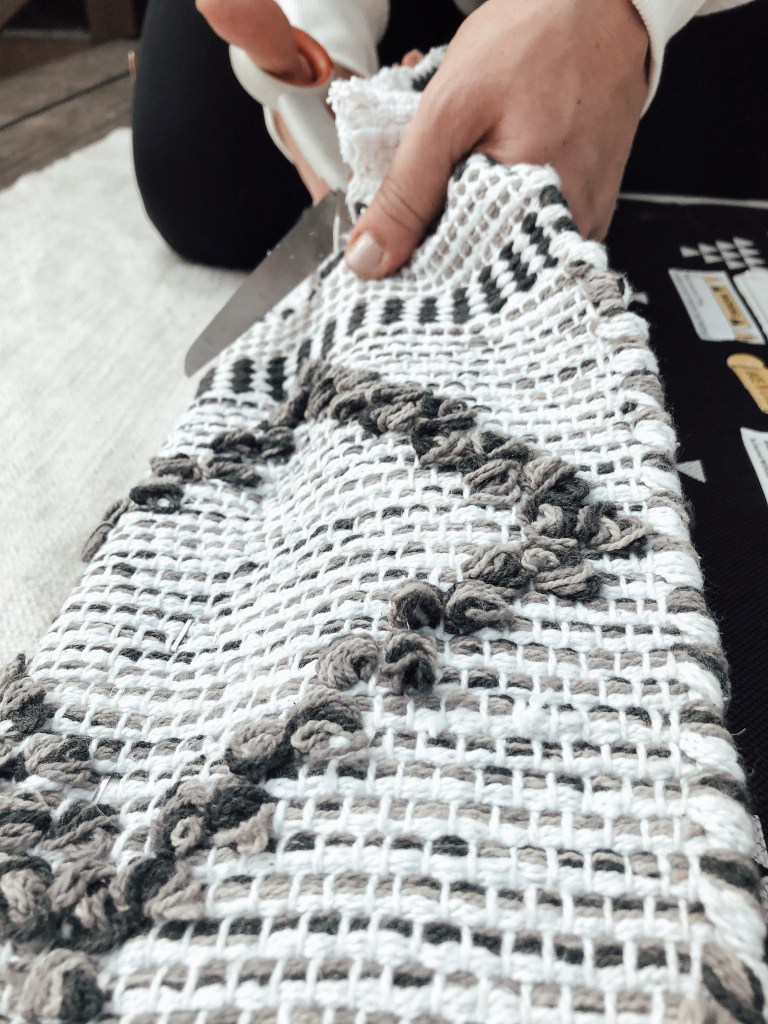
Before stapling the shorter sides I cut the excess fabric from the long sides and at the corners I cut angled slits to get rid of some of the bulk and help the rug to lay flat against the cushion.
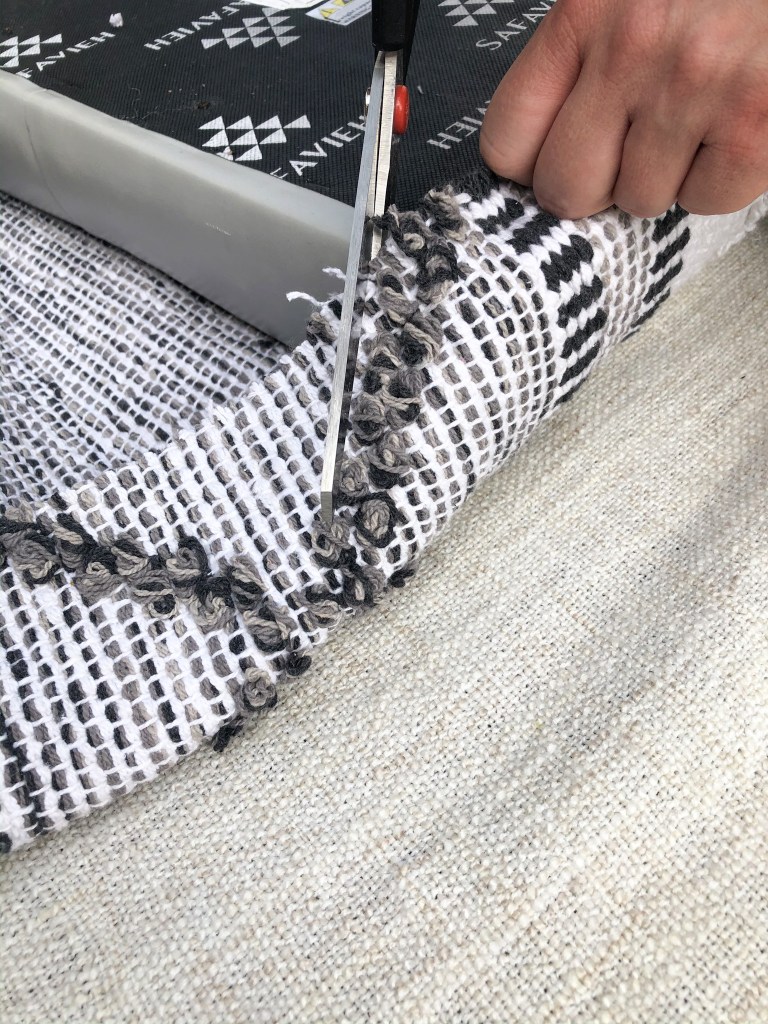
When I got to the shorter ends I treated the bench like I was wrapping a present to create nice, sharp corners.
I discovered as I was cutting the rug in this direction, that it started to unravel. After a small panic attack I grabbed some duct tape to wrap around the edges and hold the ends together. I then added a few more staples to make sure the rug didn’t unravel any further.
It was time to screw the legs back on but as you can imagine the bench cushion was much thicker now and the previous screws were too short. Thankfully, we seem to always have screws on hand from some project so I was able to find longer screws that worked perfectly.
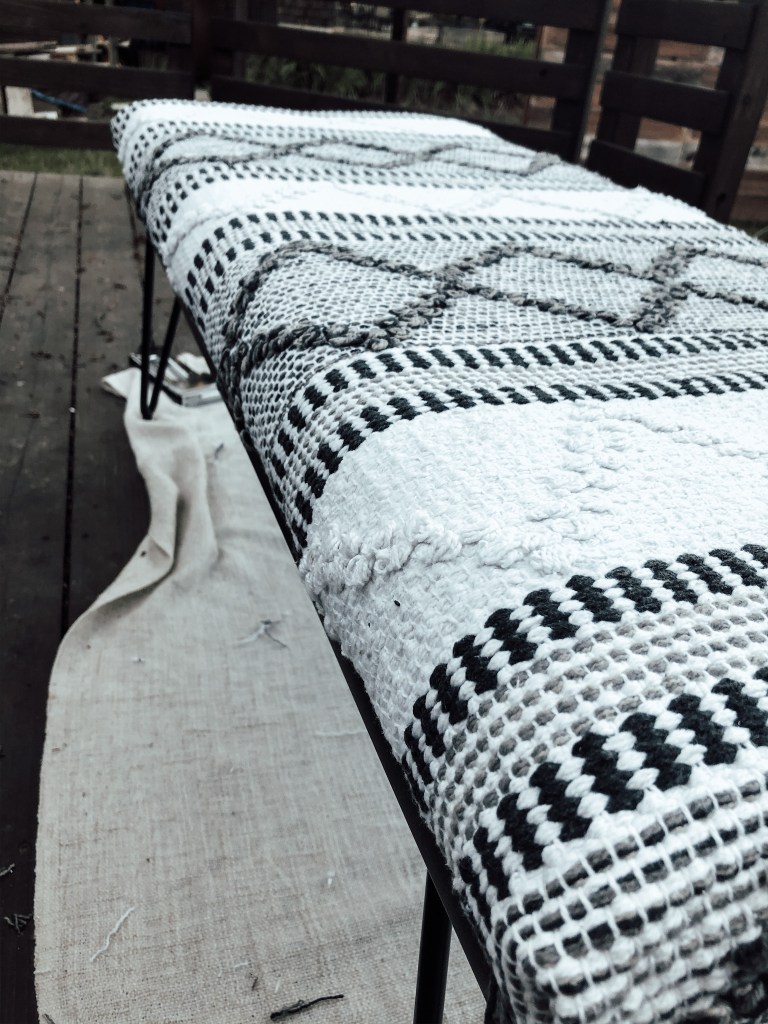
The bench turned out great and added a much needed texture element to my dining space.
“Gotta Start Somewhere” is my theme for 2020. This saying is now on my letter board so we know it’s official.
I’ve always been good at dreaming, planning, even scheming but what good is that if you never actually DO anything. Well, starting now this changes. I’m stepping out into the world of blogging and pretending like I have a voice worth listening to. I have a passion for interior design, DIY home projects and raising my 3 boys. And for some crazy reason I want to share all of that with you!
I often want to be at the finish line, straight to the happy ending without having to put the work in (I know I’m not alone in this). But I’m discovering how much I’m missing out on when I try to live my life in “fast forward” mode. There was a time when this life, right now is what I was dreaming of! How sad that I’m not taking the time to enjoy it.
In the midst of starting new adventures and dreaming of the happy ending is the space in between. This is the space I usually loath and want to skip through, this is the space I will commit to embracing. I hope you will come with me and we’ll learn together to love where we are at, knowing that what we do now shapes who we are tomorrow. And these spaces between is really what makes up our life in the end!
Thanks for being here, I can’t wait to see where this goes!